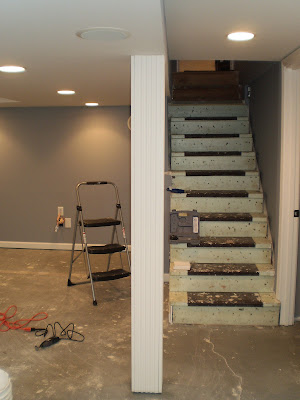
I’m sure many of you have metal pillars in your basements,
particularly if it’s an unfinished basement.
Actually, yes, of course you do otherwise you’re home may just topple
over! While these pillars are a very
functional aspect of a home, most of us want to minimize their presence in
finished spaces. When we bought the
house and the basement was semi-finished, the pillar was painted. But, that didn’t do much to hide the rust
bubbles and dents, so we decided we’d buy one of those pillar kits at Lowes.
Fast forward a few months.
We now have new drywall, fresh paint, and it’s time to put that pillar
on!
After staring at the kit for awhile, and seeing that the top
and bottom molding/rings don’t come apart, we decided we didn’t know how you
put this on when your project is not new construction. If any of you know, please do let us know how
you went about this. We’d love to know!
Based on this we scraped, primed, and painted the pillar in
the hopes we could make it “just blend in”.
But, being that it’s one of the first things you see when you come down
the stairs, it just wasn’t working for me.
So, to Lowes we went where we found some molding (5 ½ x 7.5) that we
used to box the pillar in.
Here’s how we did it:
- First, we secured a piece of wood to the floor and the ceiling (the first plank of molding needed something to lean against).
- Then, we connected second plank and matched the corners so it was flush from both sides. As I held it, my husband used the nail gun. One of the hardest aspects was holding it in place while he nailed it together. This definitely is a two person job and requires a little patience…
- We attached the third plank and noticed that the pillar felt a little flimsy at the top and bottom. We decided to use some spray foam to add a little more substance between the planks to allow for more stability. Then, we attached the fourth plank.
- Lastly, we filled the nail holes, caulked the gaps, and painted it white.
We now have a pretty, finished pillar as you walk down our
stairs; this little project really added a nice, finishing touch. I love how it turned out!
Hope you all have enjoyed your weekend, it's nearly over, so I'm shutting down the laptop for the night. Please follow my blog to hear more about our basement renovation!
Hope you all have enjoyed your weekend, it's nearly over, so I'm shutting down the laptop for the night. Please follow my blog to hear more about our basement renovation!
 |
| Just after we installed the wood blocks to the ceiling and floor. |
 | ||||
| All the molding is nailed together. |


No comments:
Post a Comment